| “ | The Philadelphia is gone, Reykjavik has been overrun, and Nod forces are now attacking the only remaining GDI world command hub in the Pentagon. If we lose the Pentagon, GDI will be thrown into chaos and the war will be lost. Your mission is to defend this vital installation. The first priority is restoring power to the building defenses and systems so you can repel the main Nod attack. Then you'll need to get an engineer into the Pentagon to reestablish the command and control system links. Your final objective is to counter-attack and drive Nod out of the area. - Mission briefing |
” |
The defense of the Pentagon is the second mission of the GDI campaign in Tiberium Wars, where GDI makes a desperate stand to defend its last remaining global command hub at the Pentagon.
New Additions[]

|

|
Background[]
With the destruction of the Philadelphia having eliminated most of GDI's leadership and the forces of Nod launching a full-scale assault against GDI-controlled sectors across the planet, things were looking extremely dire for the Initiative.

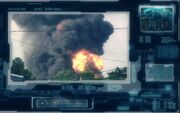
Damage created by Nod assault
The situation was further complicated by GDI's disorganized response, as the loss of the Philadelphia and Reykjavík being overrun resulted in a communications breakdown, leaving Blue Zones cut off from one another and their orbital ion cannon network. The only base capable of sustaining GDI's command-and-control needs and was capable of giving their remaining leaders the full picture of the attack was the Pentagon in Blue Zone B-2, and even it was taken offline by repeated Nod attacks.
Having mustered whatever troops he could, the GDI Commander was dispatched to reinforce the troops already defending the command centre and hold off the Nod forces at any cost. The Pentagon needed to stand if GDI was to regroup and push the invaders from their Blue Zones.
Events[]
A small force of Riflemen and Engineers arrived to the scene of the Pentagon. To the GDI soldiers' dismay, their air support, a Firehawk piloted by Captain Hunter, is quickly overwhelmed and shot down by Nod Venoms. Things were not looking up.
Regardless, the team had a job to do. The Riflemen moved into the Pentagon's power complex and cleared out all the attacking militiamen, and the Engineers brought up the rear and rerouted the buildings' power to the Pentagon's defenses. Another entered the Pentagon itself and re-established communications with GDI command while the now-online Watchtowers cut down the remaining Nod soldiers.
Despite this rousing success, the on-site Nod commander was not prepared to give up yet. A wing of Vertigo Bombers swept in and destroyed the Power Plants, rendering the Watchtowers offline once more. With another wave of infantry closing in upon the Pentagon, the Riflemen were forced to hole up in the guard towers surrounding the complex and gun down the horde of attackers themselves. While they were joined by fellow soldiers who had been stationed within the Pentagon, who appeared to deem the situation stable enough to leave their charges, the combat was still brutal and it was with relief that an APC team arrived on the scene and mopped up the remainder of the enemy troops.
Nod had already expended exorbitant numbers of personnel on this failed assault, and while the Nod commander regrouped and assessed his options, the GDI Commander went in for the attack. A team of Grenadier Squads joined the defenders and quickly stationed themselves in the APCs. Their deadly skill with their grenades proved to be quite useful at dislodging the Nod infantrymen dug in in the buildings around the Pentagon, and shortly thereafter only a Nod outpost and a forward base remained of the once-prominent Nod presence in the area.
Joined by two additional APCs who had managed to fight their way to the Pentagon, the strike group began the attack on the small and poorly-defended forward base. No doubt blinded by their certainty of their victory and their faith in the prophecies of their fool of a leader, the outpost was poorly protected from attacks and the militiamen guarding it collapsed under the APCs' machine gun fire as quickly as the structures they protected under the grenades of GDI's explosives marksmen. With the way cleared, three more APCs arrived on-scene to assist in the counterattack.
Their main objective now lay before the GDI soldiers: the outpost that had sustained the attack on the Pentagon in the first place. Nod forces had clearly been more deliberate about the defense of this base: several of the nearby buildings were garrisoned, and Attack Bikes armed with armor-piercing missiles watched the perimeter. These civilian buildings, however, were no more intended to withstand grenades than their counterparts at the base of the hill, and their occupants were once more forcefully evicted from them. This did not escape the attention of the Nod commander, who ordered his remaining troops - Attack Bikes, a few squads of infantry, and even a few teams of the Brotherhood's elite Black Hand - to crush the interlopers, but after the shots died down it was GDI who had emerged victorious. Unopposed, the strike team tore down the last of the Nod buildings in the Pentagon area. Victory had been snatched from the jaws of defeat, and GDI's command center had been saved.
The Initiative was not out of this war yet.
Aftermath[]
With the Pentagon secured, what remained of GDI's command was safe and could begin the organization of the counterattack effort. However, the situation was still dire: much of Washington DC and, by extension, Blue Zone B-2, remained under Nod control and with it GDI's air superiority, navy, and supply lines were all down.
Lieutenant Kirce James advised the commander to take back Langley AFB to reestablish GDI's dominance of the skies, or to sabotage Nod's occupation force at Hampton Roads to get GDI's supply lines up and running again. Only once these two critical factors were dealt with would GDI be organized enough to make the final step and expel Nod from the area for good.
Walkthrough[]
Battlefield info[]
- You start to the south east. Your enemy's main base is to the northwest. They have a secondary outpost near your base.
- You start with two rifleman squads and five engineers. Your base also has watchtowers, but they are offline because of power problem. One or possibly both of your rifleman squads will be promoted to elite only through killing the first enemy militant rocket squad.
- You start with free radar and two units of power to keep the radar operational. To further prevent disruption of your radar, the game changes the ownership of your base's watchtowers to an allied yellow faction whenever you don't have power to maintain them.
- There is a supply crate behind the interstate near the beginning of the mission. You can find a veterancy crate and a heal crate near the northern edge of the Pentagon's borders. Two more veterancy crates are located behind the secondary Nod outpost.
- You can garrison up to ten units inside the Pentagon building. All other buildings in this game can hold a maximum of three.
How to proceed[]
Kill the nearby militant rocket squad and the militant riflemen attacking your power plants. Once the Militants are down, bring your engineers to repair your power plants.
The Watchtowers will turn on and begin cutting through the Nod infantry. It is worth noting that these Watchtowers are far from invulnerable, especially from the Militant Rocket Squads, and the player is given no funds (and therefore cannot repair them). This should not be of too much trouble (as the player is expected to repair the Pentagon, and thereby receive Riflemen Squads, shortly thereafter), though in dire situations the starting Riflemen can be garrisoned in the guard towers to repel them. At any rate, the Pentagon itself should be ordered to be repaired by another Engineer, which triggers the entry of a team of bombers.
Four Vertigos will enter and destroy the Power Plants that were previously captured. This will shut down the Watchtowers and trigger the arrival of five Riflemen Squads from the Pentagon. Garrison them in the guard towers as instructed (it does not matter which, though occupying at least one at each entrance is recommended due to the spread of the attacks). For some time Carryalls will airlift in Militants of both types, but they should be easily repelled by the garrisoned guard towers. The stability of the towers is not a concern, as their health pool appears to have been increased and they can resist even multiple volleys from Militant Rocket Squads with minimal damage.
After this defense phase is over, a reinforcement team of six Guardian APCs and, shortly after six Grenadier Squads, will arrive. Note that one of the Guardian APCs will come under minor attack by a garrison near their entry point, though since it is garrisoned with Militants it deals minimal damage. The attacks against the Pentagon also let up substantially. The Grenadier Squads can be loaded into the APCs, as intended by the level designer, though against buildings garrisoned by rocket troopers it is often better to have the Grenadiers attack on their own to reduce damage done to the player's forces. While doing so, the second objective of clearing out the four indicated structures should be completed. Two Grenadier-loaded APCs will arrive at the same location that the original APCs came from.
The other secondary objective concerns the destruction of an infantry forward base nearby. It should be relatively easy to destroy - to minimize casualties, attack with APCs and garrisoned infantry. The Militants there should be ineffective against the vehicles' armor, and subsequently be defeated with minimal damage. The APC-garrisoned Grenadiers are more efficient at destroying structures than garrisoned Riflemen, though the only major difference this makes is time expenditure. Two veterancy crates also lie behind the base. After the destruction of the Hands of Nod within the base, the secondary objective will be completed and the player will receive three Riflemen-garrisoned APCs.
The main base at the top of the hill is harder. The main entrance is protected by three structures garrisoned by rocket Militants backed by a few Attack Bikes. These defenses combined have quite the punch against the APCs, whose occupants will be killed along with them in the event they are destroyed. The buildings can be cleared out by the Grenadier squads, and the lighter Attack Bikes can also be eliminated by the Grenadiers or the Riflemen (though the former are more efficient). Once cleared, the buildings can be garrisoned by the GDI infantry themselves for protection. The infantry can be dealt with using the APCs. A Raider Buggy is also within the base, but its anti-infantry weapon means it falls to its more numerous GDI counterparts easily.
Once the defenses are cleared, it is simply a matter of clicking on the indicated structures. The Hand of Nod will continuously train Militant infantry, but they can easily be eliminated while exiting the structure by garrisoning the nearby building or merely having a few anti-infantry troops nearby. Note that the Vertigos will make no attempt to destroy your units, and as such are not a threat.
Throughout the mission the Vertigos may occasionally launch a bombing run on the Pentagon, but they appear to do no real damage to it and are not a concern.
Alternative approach[]
You're not supposed to build anything in this mission, since you have no credits and no access to credits sources such as Tiberium or Tiberium Spikes. However, you have an extra Engineer (presumably as a backup), with which you can capture a Nod production building. In addition, you can sell your watchtowers ($300 each) and two of your power plants ($400 each) to gain some credits. (The destruction of the power plants is a losing condition, but only prior to their capture. However, if you sell all three, the mission will break.) You have access to the entire Nod technology tree except Saboteurs. While you cannot build high-end Nod units because of the shortage of credits, you can still produce militant rocket squads. They are effective against Nod attack bikes.
Selling each watchtower also gives you one free rifleman squad, which you can garrison inside your base's four guard towers.
Trivia[]
- After completing this mission, the Commander will be informed that GDI had lost its air superiority while explaining the strategic importance of retaking Langley AFB - hence why reinforcements in the mission, such as the APCs, arrived manually instead of by V-35 Ox. However, Captain Hunter's Firehawk was seen at the beginning of the mission, and unlike the Venoms that it was pursued by, would need an Airfield or a Combat Support Airfield to remain operational.
- In Tiberian Dawn, Seth intended to order the Nod commander to attack the Pentagon, an operation he considered suicidal. This mission proves Seth correct. Although neither Nod nor GDI employed their high-tier infantry and vehicles, Nod had total air superiority and access to both Venom gunships and Vertigo bombers.
- In the defense phase of the mission, each Carryall unloads several squads of infantry, which is not normally possible.
- Like in the previous mission, the guard towers, gates and the walls surrounding the Pentagon are relics of the Second Tiberium War. Though the TWII-era wall segments are indestructible in Tiberium Wars, there is a gap in the walls surrounding the Pentagon.
- A few civilians can be seen wandering around in the midst of the Nod invasion.
- Unlike many other missions, the map is merely revealed instead of expanded when the Pentagon is successfully protected. The starting troops can therefore be used to explore the map and also the base that becomes the final target.
- The Venoms that down Captain Hunter's Firehawk are not seen again, nor are any other Venoms for the duration of the battle.
Videos[]
| |||||||||||||||||||||||||||||||||||||||||||||||||||||||||||||||||||||||||||