| “ |
More bloodshed awaited Yuriko after her failed escape attempt. In her defiant act, the Imperial Shogunate found evidence of the Omega Program's successes. So they gave her a new surname, a psychic dampener that controlled her temper, and a job defending her nation's front lines. And there she failed again. Now she suddenly regains her senses. She is disoriented and freezing, and above all, angry. |
” |
The Traceless Massacre is the second mission in Yuriko's campaign in Uprising.[1]
Background[]
The special report on Yuriko continues. During the war, Yuriko became the Empire's psychic commando, and her powers made her one of the deadliest weapons in the Empire's arsenal. Her reign of terror was ended during the Allied assault on Tokyo, when she was found unconscious underneath the rubble of the Imperial Palace. She was taken into custody and transferred to a top-security Allied detention facility deep in the jungles of Guam.
Events[]
| “ | He did this to you, Yuriko. Dr. Shimada turned you into this. Because of him, you will always be hunted. Always... It is time to wake up, Yuriko. - Izumi |
” |
After months of imprisonment, Yuriko was telepathically awoken by Izumi, who told her that Shimada was responsible for all her sufferings, and that because of him, she will always be hunted.

Yuriko breaks free
Using her restored psionic powers, Yuriko broke free from cryo-containement, and began wreaking havoc in the detention camp. She broke into other containment cells, freeing the Soviet and Imperial POWs inside. They soon joined the battle against the Allied security personnel there. Angered by her imprisonment, Yuriko decided that Shimada can wait, and vowed to tear the entire detention camp apart.
Yuriko accessed the various data terminals inside the camp in an attempt to locate the base's weakness, and found out that the Allies have been spreading propaganda, demonizing Tatsu and praising the Allied commanders responsible for the invasion of Tokyo Harbor as heroes. She also discovers that most of the base's security personnel are not Allied soldiers, but hired guns from FutureTech, and that the Allies simply bought their services.

Chaotic battle inside the Detention Camp
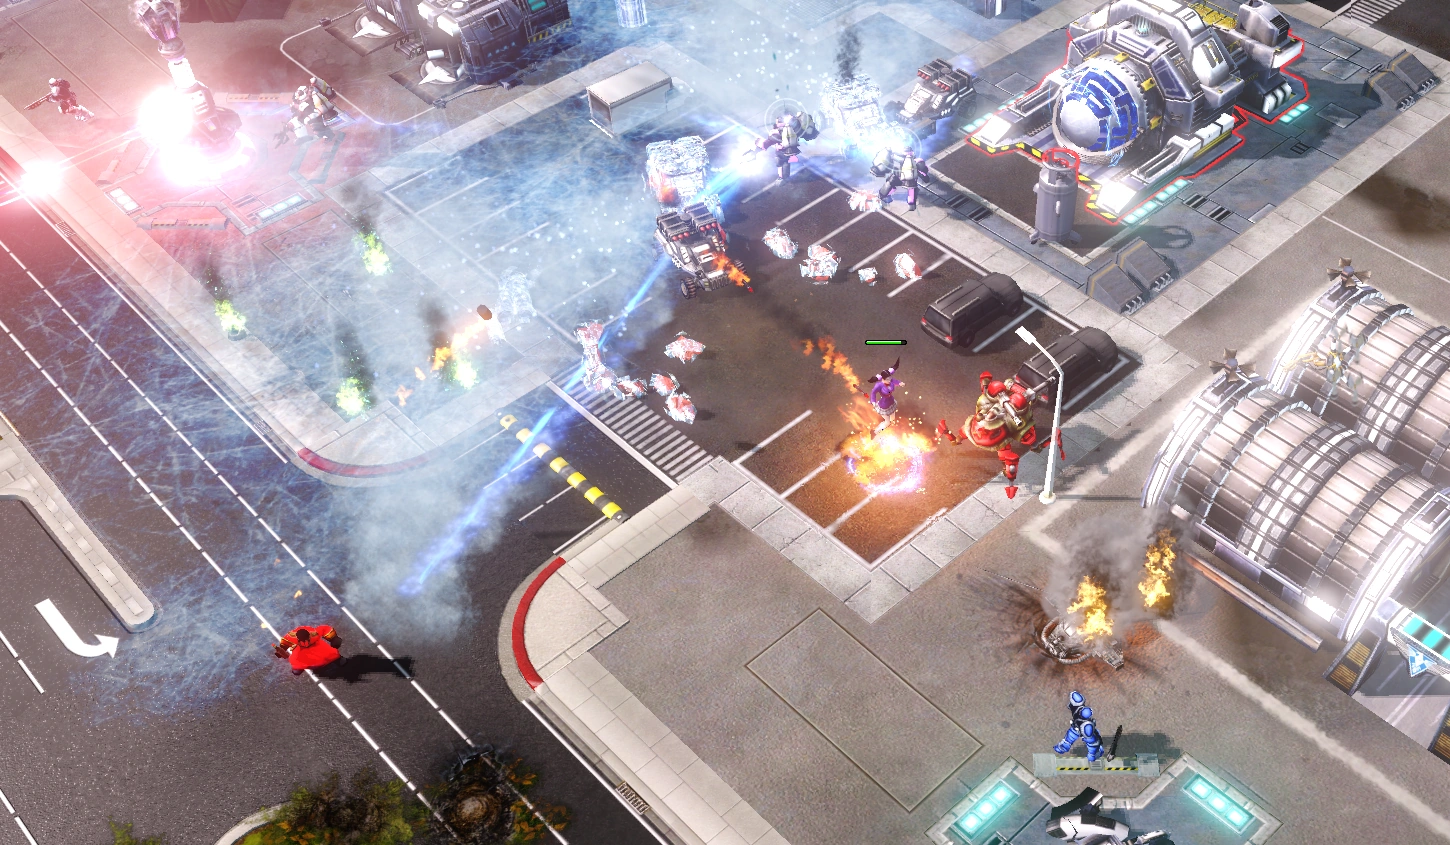
Camp Dakota proves to be heavily fortified, with armed guards, base defenses, and disguised Mirage tanks lurking around every corner. It is even equipped with prototype FutureTech weapons, such as the Harbinger gunship and Pacifier FAVs. However, Yuriko still managed to destroy everything of value in the facility, and planned to escape back to the Empire to deal with Shimada.
The Allies learned about Yuriko's escape, and sent two carrier strike groups to intercept her, however, she managed to sink them to the bottom of the ocean, and successfully escaped from the Detention Camp. She then returned to the Empire in order to rescue Izumi and exact her revenge on Shimada.
Walkthrough[]

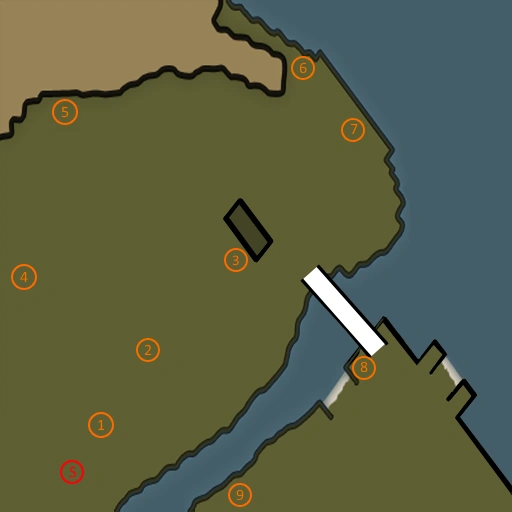
A map of the stage, with the starting location and terminals highlighted
(Note: This walkthrough assumes Hard difficulty.)
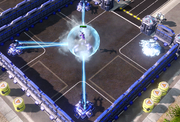
You begin this mission frozen by four Multigunner turrets loaded with Cryo legionnaires, meaning you cannot use normal attack, though you can still use Psionic Talents. Either reflect the cryobeams back with Psionic Shield or destroy the turrets by slamming the explosive barrels outside into the turrets. As soon as you're free, access the data terminal outside (Cold Storage) to gain a Psionic Talent point.
Be careful of the Cryo legionnaires outside the cells, they have a lot of health, and can quickly freeze you. Kill them quickly with Psychokinetic Burst, or take control of them using Psychic Domination. Free the prisoners in the other cells by destroying the turrets freezing them. They will not attack you, and can provide a valuable distraction against the Allies. Not far from your starting location, you will find the second data terminal (The Dregs of Leningrad).
Watch the skies, as the Allies will continuously send Vindicators after you until you destroy their Airbase. Their bombs can quickly drain a lot of health, and can easily kill you if you are not careful. Since they are usually too fast to be brought down, use Shields to protect yourself when they approach. By the time you free the Desolator and access the data terminal beside him (One Sick Freak), immediately turn back and head for the fourth terminal. The area after this point is far too dangerous right now.
Beware that the fourth terminal (The Tokyo Toll) is guarded by multiple Mirage tanks disguised as trucks. It is best to approach it with your shield up. The fifth terminal (Rebel Son of the Rising Sun) is just north of it, guarded by a construction yard (which will construct base defenses) and two Multigunner shotgun turrets. The sixth terminal (Hush Little Baby) is perhaps the most dangerous, since it is in range of multiple Pacifier FAVs, as well as the FutureTech base's Spectrum towers. With shield up, quickly get to the terminal to restore your health, as the terminal is located in the blindspot of the Pacifiers, then retreat back to the medical tent near the bridge.
Now is time to begin demolishing the FutureTech base. Be sure not to engage too many enemies at a time, and watch for the targeting cursor of Pacifiers. Make sure to prioritize Spectrum towers, which can make short work of you, and units with cryo weapons, which can make you a sitting duck for the Pacifiers. Once you are done, access the seventh terminal (Contract Negotiation).
After that, it's time to leave. Cross the bridge, take out the Multigunner turret and access the eighth terminal (Cold Hard Cash). Beware of a Spectrum tower and a Multigunner turret near the Seaports. Also, a spy will approach you disguised as one of your mind controlled infantry at this point and bribe your minions away. Take them out with Psychokinetic Burst.
Make your way toward the ninth and final terminal (Panned and Scanned), note that there are disguised Mirage tanks in the Burger Kong parking lot. Access the terminal, then head toward the port. Take out the turrets guarding the port, heal up, and prepare for the final battle of this mission.
You will be swarmed by Riptide ACVs, dolphins, and relentlessly bombed by an aircraft carrier. You can mind control some dolphins, though they will not be able to help you much. If you are low on health, immediately retreat back to land and heal. The second group of enemies is even tougher, including three Assault destroyers, many Cryo Legionnaires, and even a Harbinger gunship in the sky. This time, mind controlling the Legionnaires can be very useful. Once you destroy the second carrier, the rest of the group will be automatically destroyed, and the mission will be over.
Secret Files[]
| Cold Storage | - "This base recently received a huge shipment of Cryo Canisters from FutureTech. I guess it helps keep the prisoners on ice..." |
| The Dregs of Leningrad | - "A log of all the Soviet prisoners of war stationed here, who surrendered after the battle of Leningrad. How shameful." |
| One Sick Freak | - "That Desolator Trooper, they haven't even figured out how to remove his suit without killing him." |
| The Tokyo Toll | - "This is a list of the commanders responsible for the attack on Tokyo Harbor. They're being hailed as heroes..." |
| Rebel Son of the Rising Sun | - "Allied propaganda demonizing the Crown Prince Tatsu. If not for the Prince, I might never have been born... For better or worse." |
| Hush Little Baby | - "Something about a new bombardment system called the Pacifier. FutureTech pitched it to the Allies as an alternative to their orbital defense network." |
| Contract Negotiations | - "Wait, so most of these guys are just FutureTech's hired guns? The Allies are just buying their military muscle now?" |
| Cold Hard Cash | - "The Allies have commissioned hundreds of Cryo Legionnaires from FutureTech to help 'keep the peace.'" |
| Panned and Scanned | - "They're calling this a "VIP containment center" because they freeze their subjects rather than just lock them up? This is just a prison camp." |
Trivia[]
- The voice clip "Hang on! Cryocopter support en route." that plays when Cryocopters arrive is recycled from the Red Alert 3 mission Enemy of Our Enemy.
- Strangely, a picture of Giles Price was used as the icon for "The Tokyo Toll", even though Lissette Hanley was the co-commander for the attack on Tokyo Harbor. This is most likely because Lissette's actress did not return for Uprising.
- Outside the base, an Allied Spy will disguise himself as one of Yuriko's mind-controlled minions in order to get close, and bribe other units into fighting Yuriko. Strangely, this works even on mind-controlled units.
- Yuriko says "they know what it's like" when she is about to free the frozen prisoners, which is a reference to one of her unit quotes "They don't know what it's like!"
- One of the Shinobis will remark: "This doesn't look like Pearl Harbor..." when freed.
- While it is inconsistent, the Desolator Trooper and the Shinobi that makes the remark mentioned above may follow Yuriko throughout the level.
Videos[]
References[]
- ↑ Electronic Arts Los Angeles, Command & Conquer: Red Alert 3 - Uprising. Yuriko mission 2: "The Traceless Massacre".