|
Intelligence data updated.
The following is a transcript of a game manual. The manual(s) can be directly accessed here:
|
The following article serves as a partial transcript† of the Command & Conquer: Gold Edition manual. All material written in this article is of copyright ©1997,1998 by Westwood Studios, Inc. The author of this article claims no right of the material written.
† The following sections were removed to preserve only or mostly the lore-related information:
- Getting Started
- Playing the Game
- Multiplayer Game
- Advanced Game Controls
- Credits
- Award
Understand Your Enemy[]
| “ | We have waited centuries for this moment. The rivers will flow with the blood of those who oppose us. - Kane, suspected leader of the Brotherhood of Nod (Global Net Interpol, file #GEN4:16) |
” |
Brotherhood of Nod[]
Commonly, The Brotherhood, The Ways of Nod, ShaÆSeer among the tribes of Godan; see INTERPOL File ARK936, Aliases of the Brotherhood, for more.
- FOUNDED: Date unknown: exaggerated reports place the Brotherhood's founding before 1,800 BC
- IDEOLOGY: To unite third-world nations under a pseudo-religious political platform with imperialist tendencies. In actuality it is an aggressive and popular neo-fascist, anti-West movement vying for total domination of the world's peoples and resources. Operates under the popular mantra, "Brotherhood, unity, peace".
- CURRENT HEAD OF STATE: Kane; also known as Caine, Jacob (INTERPOL, File TRX11-12Q); al-Quayym, Amir (MI6 DR-416.52)
- BASE OF OPERATIONS: Global. Command posts previously identified at Kuantan, Malaysia; somewhere in Ar-Rub' al-Khali, Saudi Arabia; Tokyo; Caen, France.
- MILITARY STRENGTH: Previously believed only to be a smaller terrorist operations, a recent scandal involving United States defense contractors confirms that the Brotherhood is well-equipped and supports significant land, sea, and air military operations.
- ECONOMIC STRENGTH: Considerable operating assets believed to be in excess of US$255.2 billion, based on audits of seized financial records {see CIA Docket 3231 .54-776 FIA).
- POLITICAL STRENGTH: Believed to be the sole backers of the Fist of Allah party in Jordan (52%); United We Stand America party in the United States (12%); Albion First! party in the United Kingdom (25+%), among others. (See Brookings Institution publication A42962-94 for full disclosure.)
- AFFILIATIONS: Irish Republican Party; Islamic Jihad; Khmer Rouge; others. (See document: Brotherhood of Nod Splinter Groups.)
- SEE ALSO: Mobius, Dr. R.H; terrorist activities; United States Global Defense Act; Report of World Energy Radical Redistribution, US Congressional Report, 1994, File XXY22.
Global Defense Initiative[]
Commonly, GDI. Before 1990, known as Special Operations Group Echo, Black Ops 9.
- FOUNDED: 12 October 1995, in accordance with the United Nations Global Defense Act (UNGDA)
- IDEOLOGY: To enforce the United Nations Global Defense Act and uphold the ideals as outlined in the United Nations Charter.
- CURRENT HEAD OF STATE: Brigadier General Mark Jamison Shepherd, Chief of Staff, United Nations Military Command.
- BASE OF OPERATIONS: United Nations Military Command Center, location CLASSIFIED.
- MILITARY STRENGTH: Within parameters of the UNGDA, Article V, Section 3A, Paragraph 12.
- ECONOMIC STRENGTH: Funded by United Nations and various national governments, public organizations, and private enterprise.
- POLITICAL STRENGTH: Not applicable: operates within parameters of the UNGDA and under the orders of the United Nations Security Council.
- AFFILIATIONS: United Nations.
- SEE ALSO: Shepherd, M.J.; United Nations, 1995 to present; United Nations Global Defense Act, 1995; Mobius, Dr. R.H.
GDI Units[]
Minigun Infantry[]
| Armor: None | Cost: 100 | |
| Seconds to produce: 7 | Range: Short | |
| Weapon: M-16 Rifle | ||
Equipped with the GAU-3 “Eliminator” 5.56mm chaingun, this troop is the key player in the GDI forces. En masse, this unit is very useful against slow-moving armored units like tanks. Just remember that large tanks can easily crush your infantry and flame-based weapons can quickly reduce entire squads to ash.
Grenadier[]
| Armor: None | Cost: 160 | |
| Seconds to produce: 7 | Range: Short | |
| Weapon: High Explosive Grenade | ||
The Grenadier is a very useful all-purpose infantry unit. This troop is faster, can see further, and hit harder than normal infantry. The grenade this unit throws can not only go over walls, but can destroy them as well. They 'splode good, too!!
Rocket Soldier[]
| Armor: None | Cost: 300 | |
| Seconds to produce: 33 | Range: N/A | |
| Weapon: Light TOW Rockets | ||
These infantry units are slower and easier to kill than other infantry, but can tear through armor faster than any other infantry unit. Their major advantage is the ability to attack airborne units. Most effective as a support unit in diverse groups.
Commando*[]
| Armor: None | Cost: 1000 | |
| Seconds to produce: 67 | Range: Long | |
| Weapon: Sniper Rifle and C-4 Explosive Packs | ||
The Commando is part of the GDI Elite Forces Unit. This unit uses a Raptor 50cal. assault rifle with suppressor that is able to take out infantry units from extreme range. In addition, the Commando carries C-4 explosives. When placed in enemy structures, these explosives will level the target structure in seconds.
* Multiplay only. May be available in single-play missions as a unit given to you at the start of a mission or as a mission objective for capture.
Engineer[]

|
Armor: None | Cost: 160 |
| Seconds to produce: 33 | Range: N/A | |
| Weapon: None | ||
Engineers are used to capture enemy buildings. Since they carry no weapons, they are extremely vulnerable on the battlefield and must be directed very carefully. These infantry are very slow, so loading them into an APC is an ideal way to move them about the battlefield.
Humvee[]
| Armor: Light | Cost: 400 | |
| Seconds to produce: 27 | Range: Short | |
| Weapon: M-60 Machine Gun | ||
These all-terrain attack vehicles are fast and very useful against infantry and can wipeout large numbers of Attack Cycles when used en masse. Its light armor makes it vulnerable to any explosive weapon.
APC[]
| Armor: Heavy | Cost: 700 | |
| Seconds to produce: 47 | Range: Short | |
| Weapon: M-60 Machine Gun | ||
The Armored Personnel Carrier (APC) transports and protects up to five troops heading to and from battle locations. Its heavy armor, fast speed, and long sight range make it an ideal scouting unit. It is also useful for crushing infantry
Medium Tank[]
| Armor: Heavy | Cost: 800 | |
| Seconds to produce: 53 | Range: Medium | |
| Weapon: 105mm APDS | ||
From its single barrel, the Medium Tank fires armor-piercing shells. It is faster, heavier and more destructive than Nod's Light Tank. This is one of the best all around vehicles in the game. It is effective against both vehicles and structures, but can be taken down by groups of infantry or aerial units.
Mobile Rocket Launch System[]
| Armor: Light | Cost: 800 | |
| Seconds to produce: 53 | Range: Long | |
| Weapon: 227mm Missiles | ||
Mobile devastation. GDI's longest-range attacker fires 227mm rockets and is effective against just about everything, including aerial threats. With no short-range fighting ability, this unit needs close-quarter backup. This is an attack only vehicle. Keep it in the background and don't let enemies in close to it.
Mammoth Tank[]
| Armor: Heavy | Cost: 1500 | |
| Seconds to produce: 80 | Range: Med/Long | |
| Weapon: Dual 120mm APDS / Mammoth Tusk Missiles | ||
Armed with dual 120mm cannons and Mammoth Tusk Missiles, this giant is a very versatile attack unit. These weapons help compensate for its lack of speed and mobility. When this unit takes a lot of damage, it can slowly regenerate its health back up to 50%. When the Mammoth tank is placed in guard mode, it can fire at aerial units.
ORCA VTOL Assault Craft[]
| Armor: Light | Cost: 1200 | |
| Seconds to produce: 80 | Range: Long | |
| Weapon: Dragon TOW Rockets | ||
This vertical takeoff and landing (VTOL) craft carries five salvos of TOW rockets. ORCAs are exceptionally useful for taking out enemy armor like Harvesters. When used in conjunction with Ion Cannon strikes, then can easily destroy enemy structures. When an ORCA runs out of rockets, it must return to base for reloading.
Transport Chinook Helicopter[]
| Armor: Medium | Cost: 1500 | |
| Seconds to produce: 100 | Range: N/A | |
| Weapon: None | ||
Provides field transportation for all infantry, rapidly deploying new troops into, or out of battle. This unit is basically an aerial version of the APC without the weapon.
MCV[]
| Armor: Medium | Cost: 5000 | |
| Seconds to produce: 333 | Range: N/A | |
| Weapon: None | ||
The mobile construction vehicle lets you search for suitable base sites. Once one is found, convert the MCV into a full-service Construction Yard and use it to build other structures. Since this vehicle is slow, unarmed, and expensive, you will want to keep it well guarded with other units.
Harvester[]
| Armor: Heavy | Cost: 1400 | |
| Seconds to produce: 93 | Range: N/A | |
| Weapon: None | ||
This armor-plated vehicle seeks out and scoops up raw Tiberium, then transports it to refineries for processing. It is slow and unwieldy and will need to be protected. Its good points are that it can take a beating before being destroyed and it is proficient at crushing enemy infantry.
Hover Craft[]
| Armor: Heavy | Cost: N/A | |
| Seconds to produce: N/A | Range: N/A | |
| Weapon: None | ||
This heavily-armored unit deploys men and vehicles during amphibious assault. It is not buildable in any missions, including multiplay.
A-10 Ground Support Aircraft[]
| Armor: Heavy | Cost: N/A | |
| Seconds to produce: N/A | Range: Long | |
| Weapon: Napalm Bombs | ||
These units are highly maneuverable, ground-hugging craft that level enemy units with napalm. When playing as GDI in the solo play missions, destroying all Nod SAM sites will give you access to the A-10 airstrikes. Since the A-10 bombs in a line, it is a good idea to pick a target that is part of a group. You can do damage to more enemies this way.
Gunboat[]
| Armor: Heavy | Cost: N/A | |
| Seconds to produce: N/A | Range: Long | |
| Weapon: Tomahawk Missile | ||
Heavily armored, and armed with surface-to-surface missiles, this unit is the backbone of GDI's naval forces. This unit makes special appearances in GDI missions, but is normally unavailable.
GDI Structures[]
Construction Yard[]

|
Armor: Light | Cost: N/A |
| Seconds to produce: N/A | Power usage: None | |
| Purpose: Produces Structures | ||
The Construction Yard is the foundation of a base and allows the construction of other buildings. You must protect this structure! Without it, you cannot build any new structures. The Construction Yard is fairly strong, but as with almost all structures, it is vulnerable to Engineers. Try surrounding your construction Yard with walls to keep out unwanted guests.
Power Plant[]
| Armor: Light | Cost: 300 | |
| Seconds to produce: 20 | Power usage: None | |
| Purpose: Provides Power to Base | ||
This unit provides power to the structures in your base. Power output is directly related to the Power Plant's condition, so protect them during battles. If they get damaged, you must repair them quickly or else some of your base defenses may cease to function. The Power Plant outputs 100 units of power.
Advanced Power Plant[]
| Armor: Light | Cost: 700 | |
| Seconds to produce: 47 | Power usage: None | |
| Purpose: Provides Power to Base | ||
This high-yield structure handles the energy strains of some later, more power-intensive structures. It may cost a bit more than the original Power Plant, but it generates double the amount of power (200 units).
Infantry Barracks[]
| Armor: Medium | Cost: 300 | |
| Seconds to produce: 20 | Power usage: 10 | |
| Purpose: Produces Infantry | ||
This structure is a field training center for all available infantry units. Building multiple Barracks will increase the rate at which infantry are produced.
Guard Tower[]
| Armor: Light | Cost: 500 | |
| Seconds to produce: 10 | Power usage: 10 | |
| Purpose: Defense | ||
Armed with a high-velocity machine gun, this structure provides manned defense against Nod ground attack. The Guard Tower is exceptionally useful against infantry and other light units, and since it doesn't require any power, it will remain functional when your base loses power. It can also detect Nod Stealth Tanks when they are near.
Advanced Guard Tower[]
| Armor: Medium | Cost: 1000 | |
| Seconds to produce: 66 | Power usage: 20 | |
| Purpose: Defense | ||
Provides strong fortification against ground and air units. The Advanced Guard Tower (AGT) fires Tomahawk missiles at considerable range, but it requires power. Because of the AGT's long range, it cannot hit units that are directly adjacent to it. It is always wise to back up the AGT with another defense like the Guard Tower.
Refinery[]
| Armor: Medium | Cost: 2000 | |
| Seconds to produce: 133 | Power usage: 40 | |
| Purpose: Converts Tiberium to Credits | ||
This unit processes Tiberium into its component elements. Building the refinery immediately deploys a Tiberium harvester and each Refinery can handle an infinite number of Harvesters. The refinery stores 1,000 credits of processed Tiberium.
Silo[]
| Armor: Light | Cost: 150 | |
| Seconds to produce: 10 | Power usage: 10 | |
| Purpose: Holds Refined Tiberium | ||
This unit stores up to 1,500 credits of processed Tiberium. When the Refinery fills to its maximum capacity of Tiberium, you will want to build Silos to handle the excess storage load. Guard it carefully. If destroyed or captured, the amount stored is deducted from your account.
Communications Center[]
| Armor: Medium | Cost: 1000 | |
| Seconds to produce: 66 | Power usage: 40 | |
| Purpose: Base Radar & Communication | ||
Allows the use of the radar screen as long as there is sufficient power. The radar screen allows for long range views of the battlefield and for commanding units over great distances. When playing as Nod against GDI in the solo play missions, destroying the GDI's Radar Facility will keep GDI from launching A-10 airstrikes against you.
Advanced Communications Center/Ion Cannon[]
| Armor: Heavy | Cost: 2800 | |
| Seconds to produce: 186 | Power usage: 200 | |
| Purpose: Particle Beam Cannon | ||
An upgrade to the Communications Center, this structure not only provides radar, but is the uplink center for the Ion Cannon—GDI's most devastating weapon. Once charged, it can unleash a blast on an unsuspecting target. The Ion Cannon requires power to charge: If your base is under powered, it will stop. To fire, left click on the Ion Cannon icon in the sidebar.
Weapons Factory[]
| Armor: Medium | Cost: 2000 | |
| Seconds to produce: 133 | Power usage: 30 | |
| Purpose: Produces Heavy Vehicles & Air Power | ||
This structure builds GDI's vehicles. It is well armored, but is also a favorite target for enemy Engineers. If your Weapons Factory is captured, not only do you lose the ability to build vehicles, but the enemy is able to build your vehicles in addition to his own. Building multiple Weapons Factories will decrease the amount of time it takes to create a vehicle.
Helipad[]
| Armor: Medium | Cost: 1500 | |
| Seconds to produce: 100 | Power usage: 10 | |
| Purpose: Helicopter Landing | ||
Building the Helipad allows the use of the ORCA attack aircraft. The Helipad is also the rearming station for the ORCA. If the Helipad is lost, the ORCA will not be able to reload. Any ORCA can use any Helipad on your side.
Repair Facility[]
| Armor: Light | Cost: 1200 | |
| Seconds to produce: 80 | Power usage: 30 | |
| Purpose: Vehicle Repair | ||
The repair facility allows you to repair damaged units. Moving a vehicle onto the repair pad will begin the repair process. All repairs are deducted from your credits. If you run out of credits while repairs are in progress, repairs will stop. Damage to the facility significantly slows repair work.
Sandbag Barrier[]
| Armor: Light | Cost: 50 | |
| Seconds to produce: 3 | Power usage: None | |
| Purpose: Base Defense | ||
Used to deter the enemy from advancing. Sandbags provide limited cover and may slow units down. Only explosive weapons such as grenades, missiles, and shells can damage Sandbags.
Chain Link Barrier[]
| Armor: Light | Cost: 75 | |
| Seconds to produce: 5 | Power usage: None | |
| Purpose: Base Defense | ||
Chain Link functions in the same way that the sandbags do, but they provide more defense. Only explosive weapons such as grenades, missiles, and shells can damage a Chain Link Barrier.
Concrete Barrier[]
| Armor: Medium | Cost: 100 | |
| Seconds to produce: 7 | Power usage: None | |
| Purpose: Base Defense | ||
Concrete walls are the most effective barrier. They are much harder to destroy and will take the enemy much longer to blast through. Only explosive weapons such as grenades, missiles, and shells can damage Concrete Barriers.
Nod Units[]
Minigun Infantry[]
| Armor: None | Cost: 100 | |
| Seconds to produce: 7 | Range: Short | |
| Weapon: M-16 Rifle | ||
Equipped with the M-16 Machine Gun, this troop is the key player in Nod's forces. En masse, this unit is very useful against slow-moving armored units like tanks. Just remember that large tanks can easily crush your infantry and flame-based weapons can quickly reduce entire squads to ash.
Rocket Infantry[]
| Armor: None | Cost: 400 | |
| Seconds to produce: 17 | Range: Medium | |
| Weapon: Light TOW Rockets | ||
These infantry units are slower and easier to kill than other infantry, but can tear through armor faster than any other infantry unit. Their major advantage is the ability to attack airborne units. Most effective as a support unit in diverse groups.
Flamethrower Infantry[]
| Armor: None | Cost: 200 | |
| Seconds to produce: 13 | Range: Short | |
| Weapon: Flamethrower | ||
Effective for maximum close-range destruction. Produces fire which burns more slowly than normal, allowing more effective elimination of humans and armament. Be careful when using these troops in groups—if one unit gets in front of another, chances are that the unit in front will catch some of the damage from the back unit. Spread them out.
Engineer[]
| File:TD Engineer Icons.gif | Armor: None | Cost: 500 |
| Seconds to produce: 33 | Range: N/A | |
| Weapon: None | ||
Engineers are used to capture enemy buildings. Since they carry no weapons, they are extremely vulnerable on the battlefield and must be directed very carefully. Loading them into an Chinook is an ideal way to move them about the battlefield. Dropping a Chinook full of Engineers in an enemy's base is a commonly employed tactic.
Chem-Warrior*[]
| Armor: None | Cost: 300 | |
| Seconds to produce: 20 | Range: Short | |
| Weapon: Chem Spray | ||
The Chem-Warrior is an advanced infantry unit immune to the effects of Tiberium. The chem-blast they carry produces a short-lived toxic cloud of Tiberium gas that will kill any infantry caught within its effects.
* Multiplay only. May be available in single-play missions as a unit given to you at the start of a mission or as a mission objective for capture.
Commando*[]
| Armor: None | Cost: 1000 | |
| Seconds to produce: 67 | Range: Long | |
| Weapon: Sniper Rifle and C-4 Explosive Packs | ||
The Commando uses a Raptor 50cal. assault rifle with suppressor that is able to take out infantry units from extreme range. In addition, the Commando also carries C-4 explosives. When placed in enemy structures, these explosives will level the target structure in seconds.
* Multiplay only. May be available in single-play missions as a unit given to you at the start of a mission or as a mission objective for capture.
Recon Bike[]
| Armor: Light | Cost: 500 | |
| Seconds to produce: 33 | Range: Medium | |
| Weapon: Dragon TOW Rockets | ||
Mounting twin rocket launchers, the cycles have great flexibility, serving multiple roles in Nod's forces. Learn to use these units in packs, hunting down lone units or harvesters. When in guard mode, they will shoot at enemy aircraft, making them ideal at destroying incoming aerial assaults. Their speed makes them an ideal scouting unit as well.
Nod Buggy[]
| Armor: Light | Cost: 300 | |
| Seconds to produce: 20 | Range: Short | |
| Weapon: M60 Machine Gun | ||
These all-terrain vehicles are armed with an M60 machine-gun in a turret. Faster than GDI's Hum-vee, the Buggy has sacrificed some armor for this advantage. Used in hit and run tactics on infantry and other lightly armored targets, the Buggy shines. Against armor, it dies.
Light Tank[]
| Armor: Medium | Cost: 600 | |
| Seconds to produce: 40 | Range: Medium | |
| Weapon: 75mm APDS | ||
This highly-mobile tread vehicle, delivers maximum weaponry and personnel destruction with minimum weight, maintenance and weaponry. Faster than any other tank on the battlefield, these units can reach a target quickly. Used in conjunction with aerial assaults, these units are very effective.
Mobile Artillery[]
| Armor: Medium | Cost: 450 | |
| Seconds to produce: 30 | Range: Long | |
| Weapon: 155mm Ballistic Charges | ||
This massive cannon has great range and ballistic power. This unit is very slow. Any attacks using this unit have to be orchestrated carefully—just getting the unit to its target can be difficult. However, once it gets within range, little stands in the way of its firepower. By nature, artillery is somewhat inaccurate.
Flame Tank[]
| Armor: Medium | Cost: 800 | |
| Seconds to produce: 53 | Range: Short | |
| Weapon: Twin Flame Cannons | ||
Especially useful against infantry and structures, the Devil's Tongue Flame Tank can mow through swarms of infantry with little or no damage to itself. To top off its destructive capabilities, the flame tank is fast, able to avoid some of the slower firing weapons and get close to its target quickly.
Stealth Tank[]
| Armor: Light | Cost: 900 | |
| Seconds to produce: 60 | Range: Medium | |
| Weapon: Dragon TOW Rockets | ||
This lightly-armored tank is equipped with the Lazarus shield, cloaking it from enemy sight. This shield is neutralized during firing, giving the tanks the ability to "appear" out of thin air. Although vehicles and most structures are not able to see the tank while cloaked, infantry and Guard Towers will reveal the tank if it gets too close to them.
Surface-to-Surface Missile Launcher*[]
| Armor: Light | Cost: 750 | |
| Seconds to produce: 50 | Range: Extreme | |
| Weapon: Honest John Missiles | ||
The SSM is Nod's longest-ranged unit, able to fire on the enemy from a great distance. Its napalm rounds are useful at cracking through tough base defenses without any worry of retaliation. Infantry in a large group will also suffer from its high area of effect. The reload rate on this unit is extremely long, requiring other units to protect it during its lag-time.
* Multiplay only. May be available in single-play missions as a unit given to you at the start of a mission or as a mission objective for capture.
Apache Attack Helicopter[]
| Armor: Medium | Cost: 1200 | |
| Seconds to produce: 80 | Range: Medium | |
| Weapon: High-Speed Gatling Cannon | ||
Nod's Apache Helicopter is fast, mobile, and carries a large quantity of ammunition. Used primarily against infantry and structures, the Apache can take down armored units when en-masse. Use them to soften up bases before a nuclear weapon is dropped, or gun through a horde of engineers coming towards your base.
Transport Chinook Helicopter*[]
| Armor: Medium | Cost: 1500 | |
| Seconds to produce: 100 | Range: N/A | |
| Weapon: None | ||
Provides field transportation for all infantry, rapidly deploying new troops into, or out of battle. This unit is basically an aerial version of the APC without the weapon.
* Multiplay only. May be available in single-play missions as a unit given to you at the start of a mission or as a mission objective for capture.
MCV[]
| Armor: Medium | Cost: 5000 | |
| Seconds to produce: 333 | Range: N/A | |
| Weapon: None | ||
The mobile construction vehicle lets you search for suitable base sites. Once one is found, convert the MCV into a full-service Construction Yard and use it to build other structures. Since this vehicle is slow, unarmed, and expensive, you will want to keep it well guarded with other units.
Harvester[]
| Armor: Heavy | Cost: 1400 | |
| Seconds to produce: 93 | Range: N/A | |
| Weapon: None | ||
This armor-plated vehicle seeks out and scoops up raw Tiberium, then transports it to refineries for processing. It is slow and unwieldy and will need to be protected. Its good points are that it can take a beating before being destroyed and it is proficient at crushing enemy infantry.
Hover Craft[]
| Armor: Heavy | Cost: N/A | |
| Seconds to produce: N/A | Range: N/A | |
| Weapon: None | ||
This heavily-armored unit deploys men and vehicles during amphibious assault. This vehicle is not buildable in any missions, including multiplay.
Cargo Plane[]
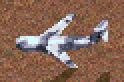
|
Armor: Heavy | Cost: N/A |
| Seconds to produce: N/A | Range: N/A | |
| Weapon: None | ||
This carrier ships purchased units to the Brotherhood of Nod via the Airfield. Any units ordered will be shipped in as soon as possible. Only one transport plane can be on the board (per Airfield) at any one time.
Mobile Rocket Launch System*[]
| Armor: Light | Cost: 800 | |
| Seconds to produce: 53 | Range: Long | |
| Weapon: 227mm Rockets | ||
Mobile devastation. This unit fires 227mm rockets and is effective against just about everything, including aerial threats. With no short-range fighting ability, this unit needs close-quarter backup. This is an attack only vehicle. Keep it in the background and don't let enemies in close to it.
* Multiplay only. May be available in single-play missions as a unit given to you at the start of a mission or as a mission objective for capture.
Nod Structures[]
Construction Yard[]
|
|
Armor: Medium | Cost: N/A |
| Seconds to produce: N/A | Power usage: None | |
| Purpose: Produces Structures | ||
The Construction Yard is the foundation of a base and allows the construction of other buildings. You must protect this structure! Without it, you cannot build any new structures. The Construction Yard is fairly strong, but as with almost all structures, it is vulnerable to Engineers. Try surrounding your Construction Yard with walls to keep out unwanted guests.
Power Plant[]
| Armor: Medium | Cost: 300 | |
| Seconds to produce: 20 | Power usage: None | |
| Purpose: Provides Power to Base | ||
This unit provides power to the structures in your base. Power output is directly related to the Power Plant's condition, so protect them during battles. If they get damaged, you must repair them quickly or else some of your base defenses may cease to function. The Power Plant outputs 100 units of power.
Advanced Power Plant[]
| Armor: Medium | Cost: 700 | |
| Seconds to produce: 47 | Power usage: None | |
| Purpose: Provides Power to Base | ||
This high-yield structure handles the energy strains of some later, more power-intensive structures. It may cost a bit more than the original Power Plant, but it generates double the amount of power (200 units).
Hand of Nod[]
| Armor: Medium | Cost: 300 | |
| Seconds to produce: 20 | Power usage: 10 | |
| Purpose: Produces Infantry | ||
This creates elite infantry units for the Brotherhood of Nod. Building multiple barracks will decrease the time necessary to train a soldier.
Turret[]
| Armor: Heavy | Cost: 600 | |
| Seconds to produce: 17 | Power usage: 20 | |
| Purpose: Base Defense | ||
For broad sweep, short-range protection against heavy assault vehicles. This is the staple of Nod's base defense, so be sure to have several of these around your base entrances. Fire-power wise, they are the equivalent of a medium tank's cannon—without the mobility.
SAM Site[]
| Armor: Heavy/Light | Cost: 750 | |
| Seconds to produce: 50 | Power usage: 20 | |
| Purpose: Defensive Anti-Airborne Unit | ||
Fires surface-to-air missiles at airborne GDI units. When the it is recessed in the ground, it is difficult to harm. However, when the launcher is exposed, it will damage more easily. Position these around your base in a triangular layout. This gives you the best chances of destroying aerial threats before they can cause serious damage to your base.
Refinery[]
| Armor: Medium | Cost: 2000 | |
| Seconds to produce: 133 | Power usage: 40 | |
| Purpose: Converts Tiberium to Credits | ||
This unit processes Tiberium into its component elements. Building the refinery immediately deploys a Tiberium harvester and each Refinery can handle an infinite number of Harvesters. The refinery stores 1,000 credits of processed Tiberium.
Silo[]
| Armor: Light | Cost: 150 | |
| Seconds to produce: 10 | Power usage: 10 | |
| Purpose: Holds Refined Tiberium | ||
This unit stores up to 1,500 credits of processed Tiberium. When the Refinery fills to its maximum capacity of Tiberium, you will want to build Silos to handle the excess storage load. Guard it carefully. If destroyed or captured, the amount stored in the silo is deducted from your account.
Communications Center[]
| Armor: Medium | Cost: 1000 | |
| Seconds to produce: 66 | Power usage: 40 | |
| Purpose: Base Radar & Communication | ||
Allows the use of the radar screen as long as there is sufficient power. The radar screen allows for long-range views of the battlefield and for commanding units over great distances. When playing as Nod against GDI in the solo play missions, destroying GDI's Radar Facility will keep GDI from launching A-10 airstrikes against you.
Helipad*[]
| Armor: Medium | Cost: 1500 | |
| Seconds to produce: 100 | Power usage: 10 | |
| Purpose: Helicopter Landing | ||
Building the Helipad allows the use of the Apache attack aircraft. The Helipad is also the rearming station for the Apache. If the Helipad is lost, the Apache will not be able to reload. Any Apache can use any Helipad on your side.
* Multiplay only. May be available in single-play missions as a unit given to you at the start of a mission or as a mission objective for capture.
Airfield[]
| Armor: Heavy | Cost: 2000 | |
| Seconds to produce: 133 | Power usage: 30 | |
| Purpose: Weapons Receiving Area | ||
Nod buys all its units. The Airfield allows cargo planes to land and deliver equipment. It is functionally equivalent to the GDI Weapons Factory. However, you do not instantly get the unit when it is complete—it must be flown in, so plan accordingly. Building multiple Airfields will increase the ordering speed, and will enable you to have two units delivered at a time.
Repair Facility[]
| Armor: Light | Cost: 1200 | |
| Seconds to produce: 80 | Power usage: 30 | |
| Purpose: Vehicle Repair | ||
The repair facility allows you to repair damaged units. Moving a vehicle onto the repair pad will begin the repair process. All repairs are deducted from your credits. If you run out of credits while repairs are in progress, repairs will stop. Damage to the facility significantly slows repair work.
Obelisk of Light[]
| Armor: Medium | Cost: 1500 | |
| Seconds to produce: 100 | Power usage: 150 | |
| Purpose: Laser-Equipped Base Defense | ||
This high-power laser effectively destroys troops and armament at long range. It is the most powerful on-board weapon in the game. Its slow recharge time means that it cannot be the only weapon defending your base, however. Make sure you have excess power before building these, because damage to your power plants will keep the obelisks off-line.
Temple of Nod[]
| Armor: Heavy | Cost: 3000 | |
| Seconds to produce: 200 | Power usage: 150 | |
| Purpose: Nuclear Missile | ||
Houses the central computer core that is the hub of all Nod communications and center of Nod command. It is heavily armored. This structure also gives Nod players the ability to fire nuclear missiles.
Sandbag Barrier[]
| Armor: Light | Cost: 50 | |
| Seconds to produce: 3 | Power usage: None | |
| Purpose: Base Defense | ||
Used to deter the enemy from advancing. Sandbags provide limited cover and may slow units down. Only explosive weapons such as grenades, missiles, and shells can damage Sandbags.
Chain Link Barrier[]
| Armor: Light | Cost: 75 | |
| Seconds to produce: 5 | Power usage: None | |
| Purpose: Base Defense | ||
Chain Link function in the same way that the sandbags so, but they provide more defense. Only explosive weapons such as grenades, missiles, and shells can damage a Chain Link fence.
Concrete Barrier[]
| Armor: Medium | Cost: 100 | |
| Seconds to produce: 7 | Power usage: None | |
| Purpose: Base Defense | ||
Concrete walls are the most effective barrier. They are much harder to destroy and will take the enemy much longer to blast through. Only explosive weapons such as grenades, missiles, and shells can damage Concrete Barriers.
External links[]
- Command & Conquer Game Manual at replacementdocs.com
| ||||||||||||||||||||||||||||||